Settings - Proxy
The Proxy tab sets the proxy server that the Server uses to reach VisualCron about its license. The Server uses it when it checks its license online, at service start and regularly after that, and when the license is activated or deactivated through the Web API. Only the license check, activation and deactivation use this proxy. Tasks, Connections, error reporting and the download of missing component files do not use it: set a proxy on each Connection that needs one. This tab is one of the tabs of the Server settings window (see Main - Settings).
When you activate or deactivate the license from the Client, the computer where the Client runs contacts VisualCron itself, through the proxy on the Proxy tab of the Client settings (see Settings - Client Settings). The Client reads that setting when it connects to the Server, so connect again after you change it.
Server -> Main settings -> Settings -> Proxy tab
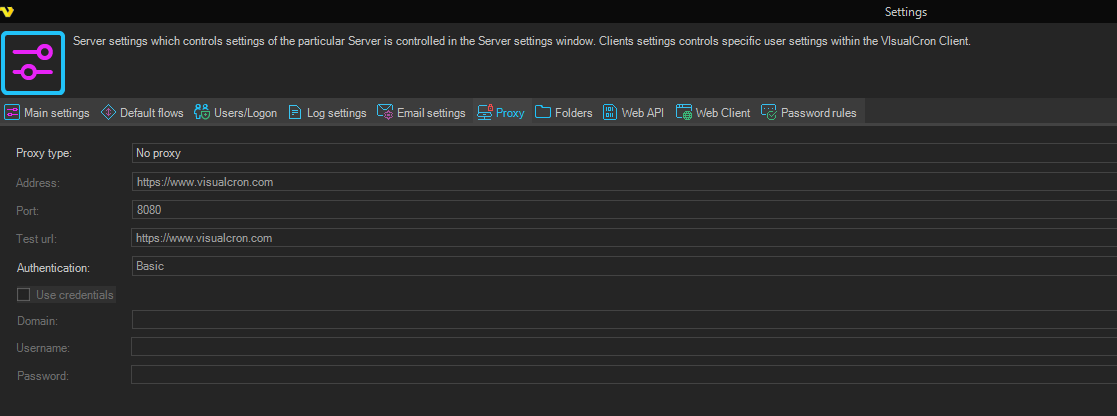
- Proxy type: "No proxy" (default), "HTTP Proxy", "SOCKS4" or "SOCKS5". With "No proxy" the other fields are unavailable
- Address: the host name or IP address of the proxy server. The field is prefilled with the VisualCron website address: replace it with your proxy server
- Port: the port of the proxy server. The field is prefilled with "8080"
- Use proxy for data channel: also uses the proxy for the data channel. Shown when a proxy type is selected
- Test url and Test: click Test to request the Test url through the proxy. VisualCron shows "Proxy is available" when the request succeeds, and "Proxy is not available" when it does not. The test runs on the computer where the Client runs, so run it on the Server computer to test the Server's connection
- Authentication: for "HTTP Proxy" only: "Basic" (default), "Digest", "NTLM" or "Not set"
- Use credentials: check this if the proxy server needs a logon, and enter Domain, Username and Password